
Concrete poetry is a fun way to express creativity in a visual form. The words are shaped into an image that is representative of the poem’s theme. The challenge with this type of poetry is formatting the work on a computer if you want to send it out for publication or publish it yourself. There are professional programs out there in the Adobe suite that are perfect for this, but they have a huge learning curve. The good news is you can use good ol’ Microsoft Word to get the job done, too, without having to figure out a whole new software. This post will show step-by-step how to format your poetry in Word using screenshots. If you have an older version of MS Word, your screen may not look the same, but it will have the same tools. They may be in a slightly different place, so you might have to look around.
Disclaimer: As you can tell from my coffee example, I am not a poet! But I know formatting tricks, and a member requested this information.
Step A: Write Your Poem, Pick Your Shape
Draft your poem in your usual way. Use a notebook or type it up in Word, whatever you feel comfortable with. If you decide to type it on your computer, you’ll want to save the file separately and open a new blank document for the next part where you create your shaped words.
Decide what shape you want your poem to take. Be mindful that the more complex your shape, the more work it will be to get your words into that form. A spiderweb will be much more challenging than an apple. It certainly can be done, but just know it will take extra time.
Step B: Find and Insert Your Picture
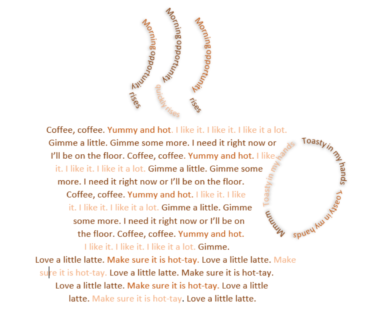
I am going to write an ode to one of the great loves in my life, coffee. So my image will be a coffee cup. I have two options for finding and inserting my picture. I can either: Go on Google images and find one I like, then download the image to my computer, or Open up MS Word and use their image search function. Don’t worry about infringing on copyrights for this picture. The photo will not be in the final work. You will essentially be using the photo as a template for the shape. After deleting the photo at the end, it will look like your words magically formed into your shape!
Here is how I found my image on MS Word and inserted it into my document:
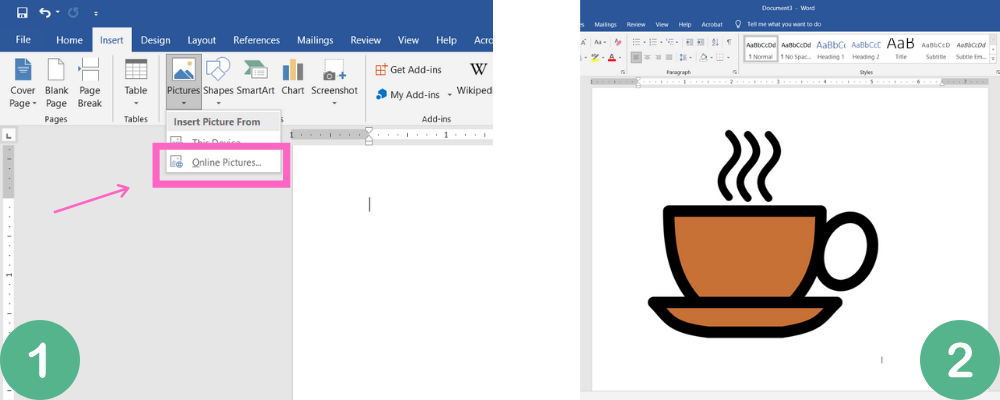
- Go to “Insert” and then select “Pictures.”
- To search within MS Word, select “Online Pictures.”
- To insert a picture you already have saved on your computer from somewhere else like Google images, select “This Device.”
Step C: Prep Your Picture to Be in the Background
The next few steps will make it so you can type over your picture. You’ll turn the image gray and have it a bit faded so you can see your test, and most importantly, make it so the image will not move on the page every time you hit return to start a new line.
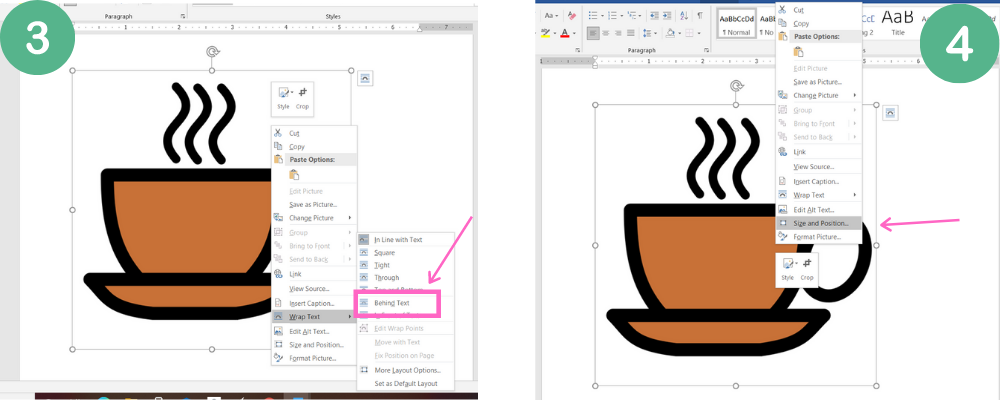
- Right click on your image so the image menu pops up. Select “Wrap Text” as shown in image 3. Then select “Behind Text.” This makes it so you can type over the picture.
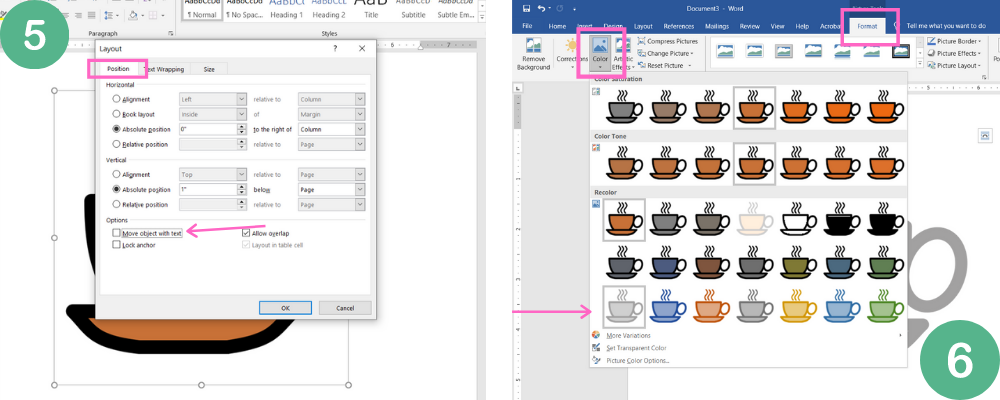
- Right click again so the image menu is back. This time, click on “Size and Position” as shown in image 4. A new window will appear as shown in image 5. Click on the “Position” tab at the top. Next, deselect “Move object with text.” Make sure the box is not checked or else the image will move when you press enter. Also, select “Lock Anchor.” Then click “OK.”
- To make the picture a light gray, start by clicking on the picture. Then click on “Format.” Next, you want to find “Color” as shown in image 6. Select the light gray option.
Test out your image. You should be able to type on top of it and press enter without the image moving. If not, go back and double check that you performed each bullet point. Be sure to move your image to where you want it on the page before you start putting in your poem.
Step D: Shape Your Words
This is the part where you will need to do some trial and error and be patient with the process. Consider this art you are making, just with words! You can start out with the easy part, straight lines. All you need to do is press tab or the space bar to shift them over to where you want. Don’t worry about things being perfect, this isn’t for a coloring grade. It’s okay if things don’t line up exactly perfect with your picture. The image is just a guide.
For sideways or turned words:
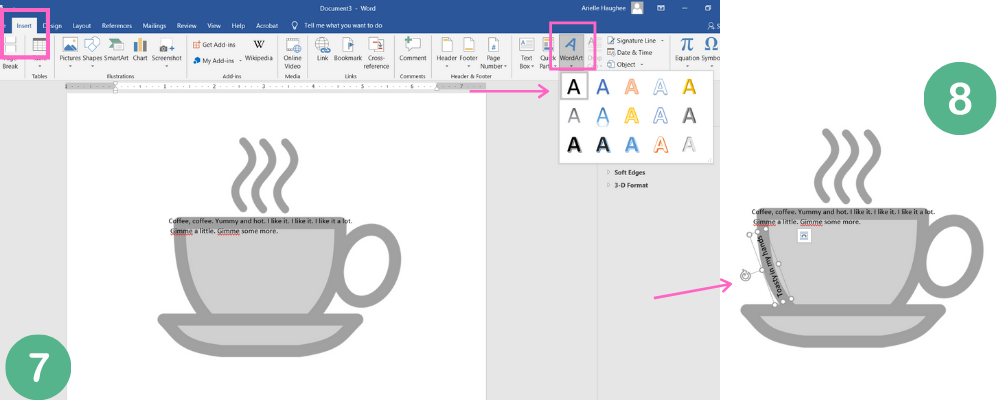
Find “Insert” and then select “Word Art” as shown in image 7. Choose the first option that is plain text. The words will likely show up a different size, so you may need to adjust your font. You change the font with word art the same way you do with regular font, highlight and then use the toolbar at the top of your screen. Then move the words to wherever you would like them to be. You can rotate the words by using the circular arrow attached to the word art box.
For curved words:
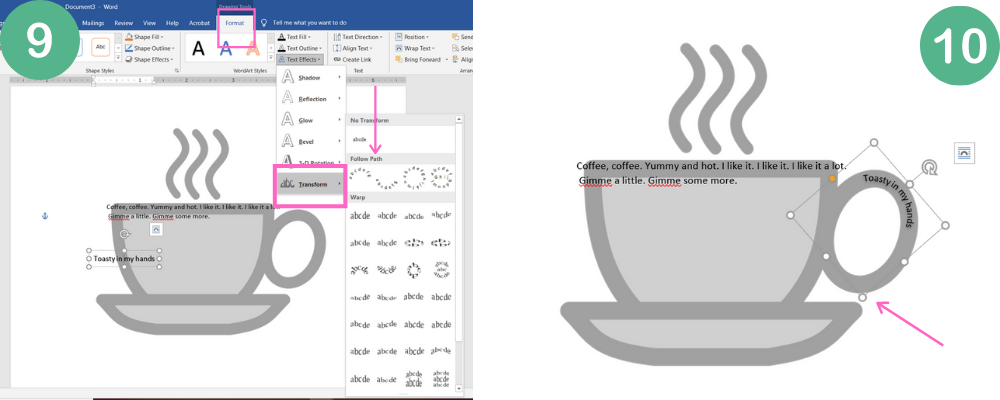
Start out the same way for sideways words and insert word art. Resize the text. Then click on “Format” and select “Text Effects” as shown in image 9. Select “Transform” and a menu will pop up for curved words. I recommend only using the first two options under “Follow Path.” You will be able to get the words to adjust as needed. After the text is curved, drag down (or up) the corner of the word art box to get the curve to fit your shape.
After inserting either sideways or curved words:
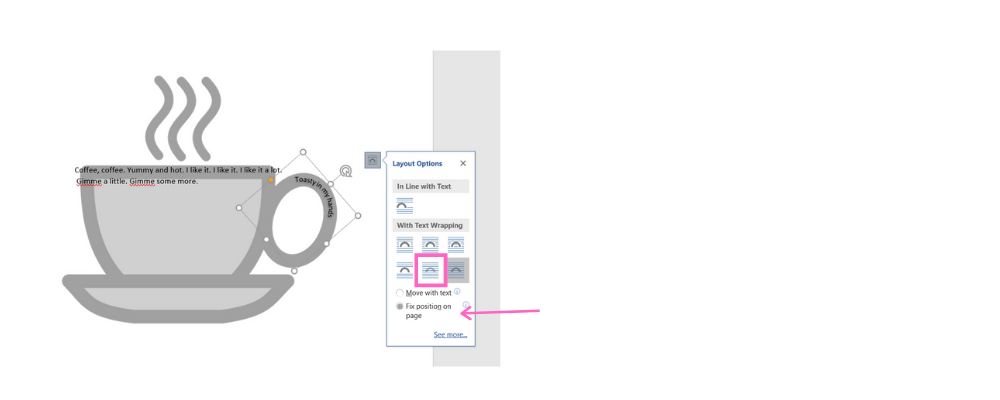
You will need to treat word art just like a picture and do a few clicks to make sure it doesn’t move around on the page. Click on the text wrapping box (the little bridge with lines) and select behind text (blue lines over the bridge). Then select “Fix position on page” as shown below.
At any point in time, if something moves that you didn’t want to, just click “Undo” at the top of the screen.
Step E: Delete Your Picture
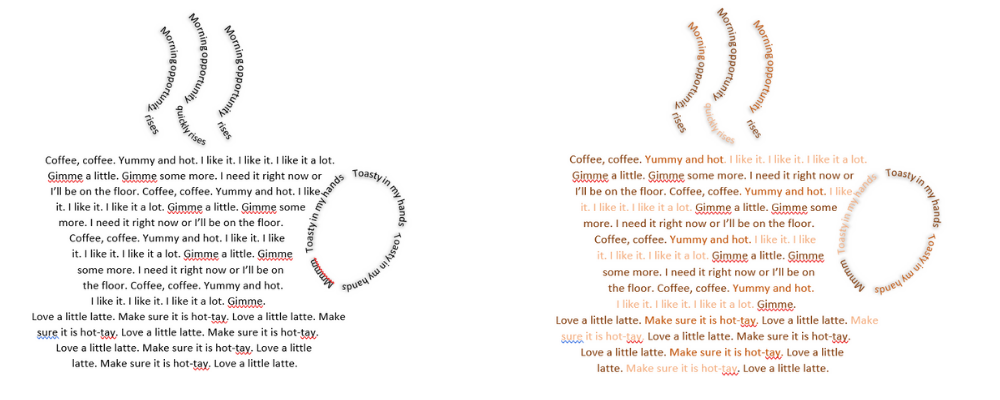
Ta da! After you delete your picture, the words will be in the shape you wanted. You can play with making the text different colors in different places for an even more fun effect.
There are a few ways you could save your poem, depending on how you are going to use it. I recommend saving it as a PDF so that everything stays right where it is and doesn’t move or shift. You could also save it as an image to either share on social media, put on your website, or insert into a manuscript. The easiest way to turn your poem into a jpg is honestly to take a screenshot using ctrl+prt sc and cropping the screen shot. (That’s what I did for this post!)
Hopefully you are happy with your results and have made a beautiful visual that matches your words.
Shutta Crum
Thanks, Arielle! I’ve done a few of these by “mangulating” everything with Word Art. But I didn’t know about setting a non-moveable image behind it while I worked. Great!
Arielle Haughee
I am definitely adopting that term. Ha!
Lynda Courtright
Whoa Arielle! That’s really cool. I use MS Word for all kinds of things – thanks for these tips and tricks!
Arielle Haughee
Thanks! I hope you have some fun with this!
Suzanne Purvis
Wow, this is fantastic. As a writer of poetry this is soooooooo cool.
Thanks for sharing.
Arielle Haughee
So glad you found this helpful! Thanks for reading.
Marie
This step-by-step is extremely helpful. Thanks so much!
Arielle Haughee
I’m so glad! Happy writing :o)